When it comes to deploying a NodeJS application, you have a variety of options such as AWS, Google Cloud Platform, and DigitalOcean.
I decided to try out Heroku for deploying my NodeJS application. Since my project repository was on GitLab, I wanted to find a way to deploy it directly from there. That's when I discovered CI/CD (Continuous Integration & Continuous Deployment) and decided to deploy my app to Heroku from GitLab. Here are the steps to follow for deploying your NodeJS application to Heroku from GitLab.
As a first step, navigate to the package.json file located in the root directory of your application. Take a moment to review the contents of the file and ensure that it includes the following:

It is crucial to provide clear instructions to the server on where to commence its operations. Furthermore, you have the option to indicate the specific versions of engines like nodejs and npm that are being utilized.
“engines”: {
“node”: “11.10.0”,
“npm”: “6.7.0”
},
If the required dependencies are missing from your package.json file, you can easily add them by running "npm init" in the terminal from your project directory and following the prompts.
Now that the deployment configuration is set up, it's time to adjust the settings of your GitLab project. Navigate to the settings section in your GitLab account.
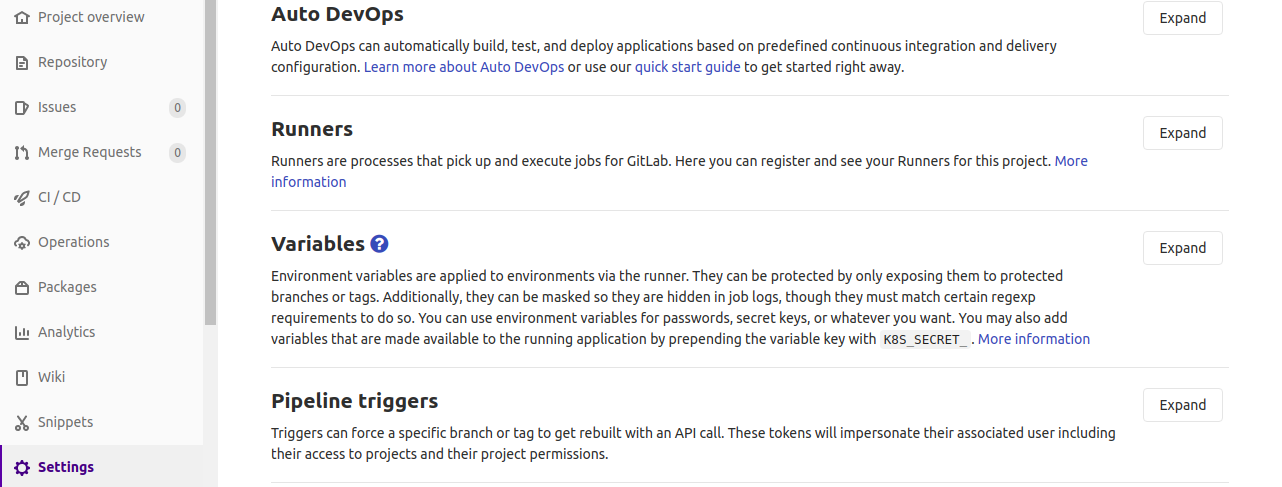
Expand the variables by adding the HEROKU_API_KEY variable, which should contain your Heroku account's API key, and introduce another variable called PRODUCTION_APP to hold the name of your application.


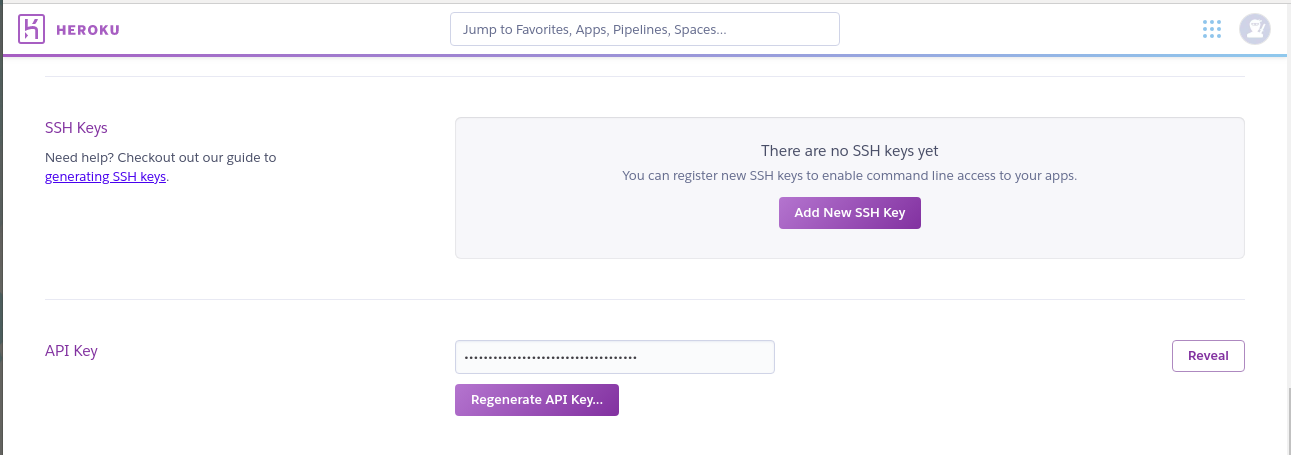
If you need to find your Heroku API key, just head to the settings on your Heroku account and grab the API Key from there.
Access the application settings in your Heroku account and configure the buildpacks needed to build your application.
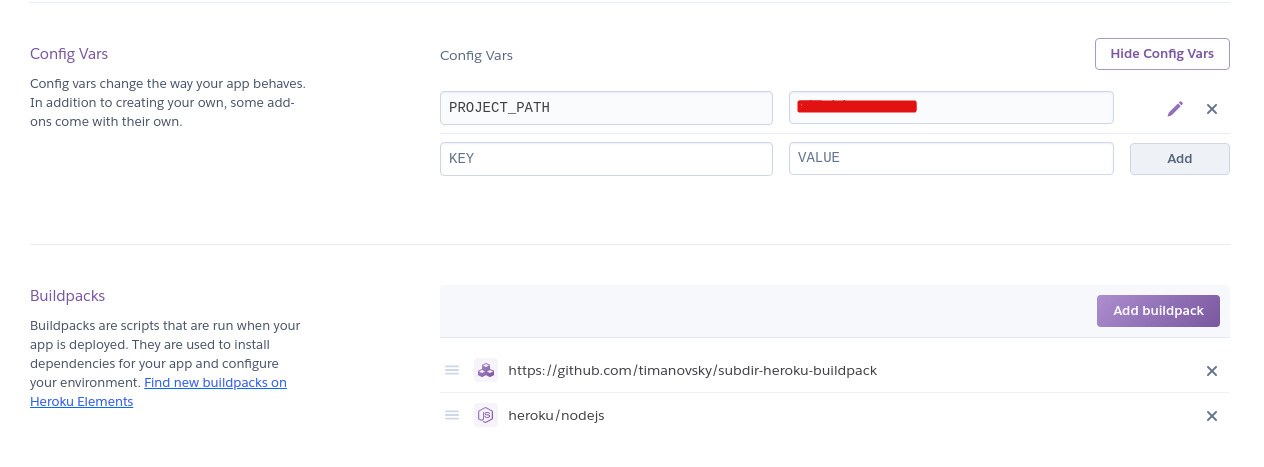
I have used the NodeJS buildpack since my application is using NodeJS.I have used another build pack since I need to deploy my application from a sub directory.
If you have an application in a subdirectory of your repository that needs to be deployed, you can define the project path using a variable, as demonstrated in the image above.
Having completed the setup of our application and selected the platforms, the next critical task is to configure the CI/CD pipeline.

Open the CI/CD configuration in your repository.You will get to configure the .gitlab-ci.yml file.

The above script need to be added to your .gitlab-ci.yml file since based on this the build process starts.You can specify different stages like testing,staging and production.You can find more details here.
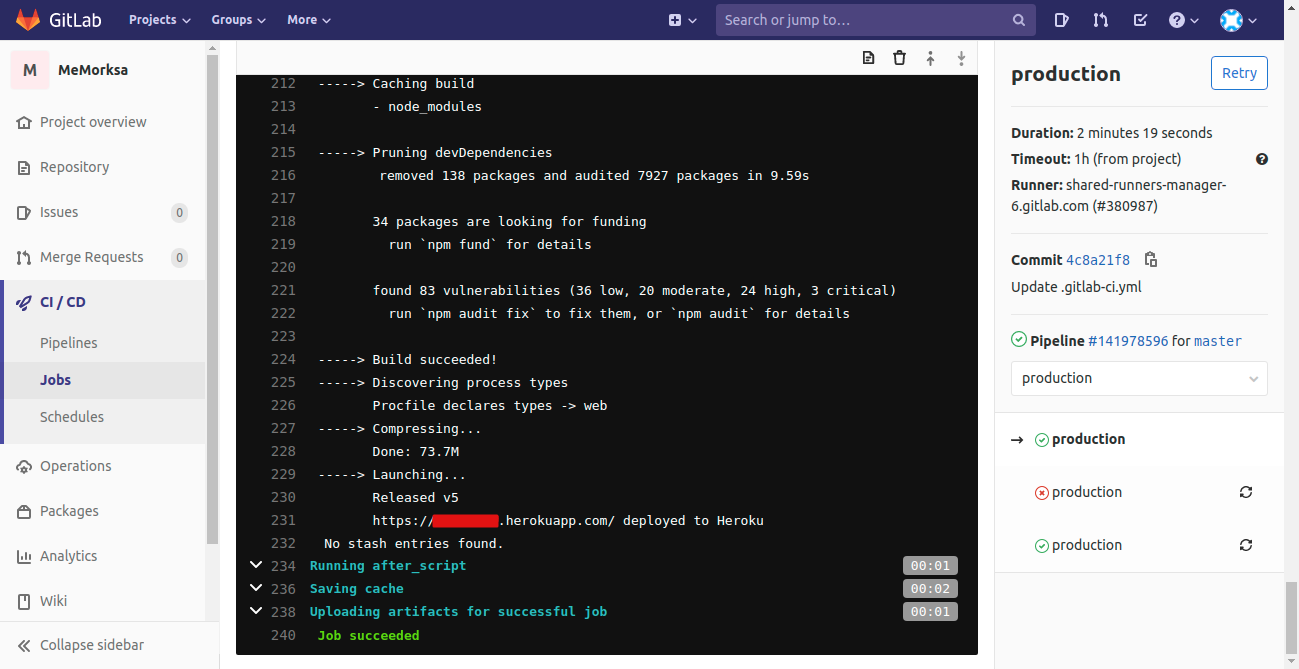
Next, head to your command line interface and push your changes to GitLab. You can also monitor the build process by navigating to Jobs in the CI/CD section of your GitLab settings.

If everything is configured well then you will get to see this.
Deploying Your Node.js App to Heroku from GitLab: A Comprehensive Guide